Configure purchase-order constraints
This guide shows the shortest practical setup for dynamic constraints. The key idea is: store product- or variant-specific numbers as attributes, assign semantic roles once, then use one reusable rule in Constraint Studio.
Before you start
Section titled “Before you start”- Your shop is on the Elevate plan.
- The PO constraint engine is enabled in Settings -> Purchase Orders -> Constraints.
- Products and supplier-variant links already exist for the supplier you want to test.
- For optimizer runs, the PO is in Draft or Sent status.
Example 1: Product MOQ with minimal modeling
Section titled “Example 1: Product MOQ with minimal modeling”Use this when a product has one MOQ shared by all of its variants. Example: a product has Red/S/M and Red/L variants, and the supplier requires at least 100 total units across the product.
1. Create the Product MOQ attribute
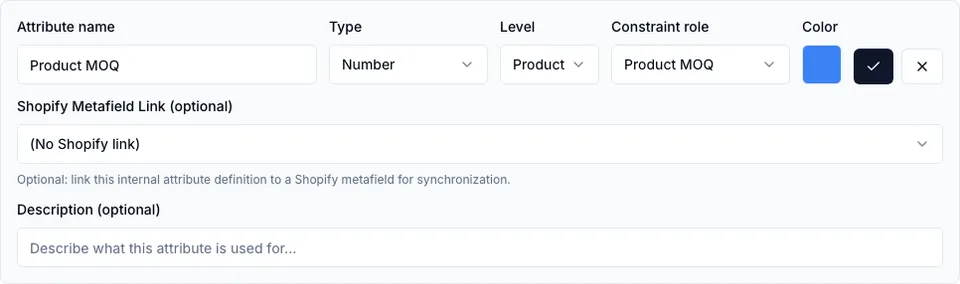
Section titled “1. Create the Product MOQ attribute”Open Settings -> Products -> Attribute Definitions and add:
- Attribute name: Product MOQ
- Type: Number
- Level: Product
- Constraint role: Product MOQ
- Shopify Metafield Link: leave empty unless you already maintain this value in Shopify
2. Enter Product MOQ values
Section titled “2. Enter Product MOQ values”Open the product or Product Settings value table and fill the Product MOQ number for each product that should be checked. Products without a value will produce a missing-data reason instead of silently passing.
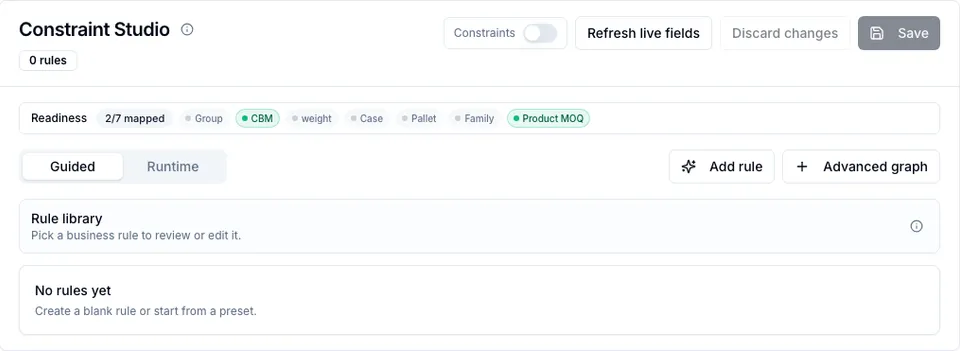
3. Check readiness
Section titled “3. Check readiness”Open Settings -> Purchase Orders -> Constraints. The Product MOQ readiness chip should be mapped. If it is not mapped, the Product MOQ attribute either has no role, uses the wrong type, or has not been saved.
4. Add the Product MOQ rule
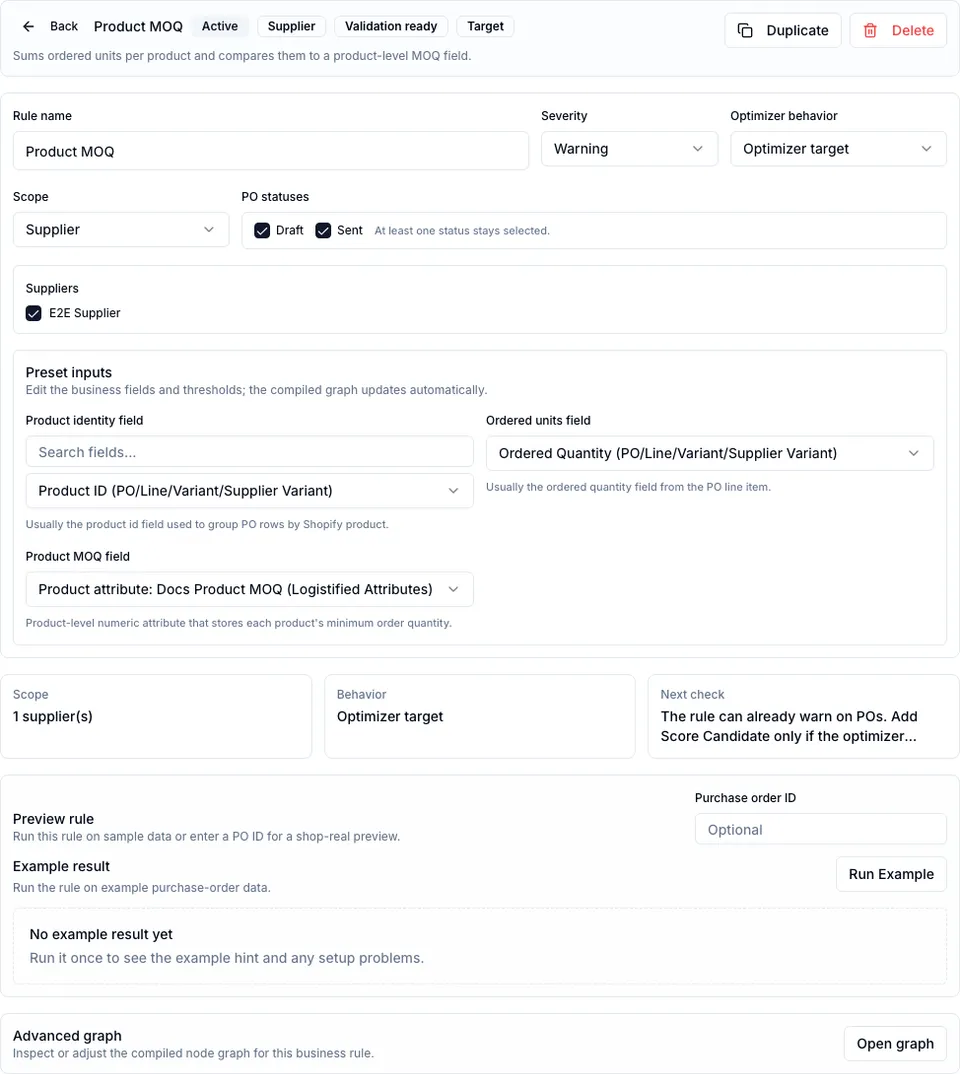
Section titled “4. Add the Product MOQ rule”Click Add rule and choose Product MOQ.
Bind the fields like this:
| Rule field | Recommended binding |
|---|---|
| Product identity field | Product ID / line_item.productId |
| Ordered units field | Ordered quantity / line_item.quantityOrdered |
| Product MOQ field | Product MOQ |
Keep the scope as Supplier if the rule should apply only to selected suppliers. Use General only when every supplier should follow the same product-MOQ logic.
5. Preview, save, and verify on a PO
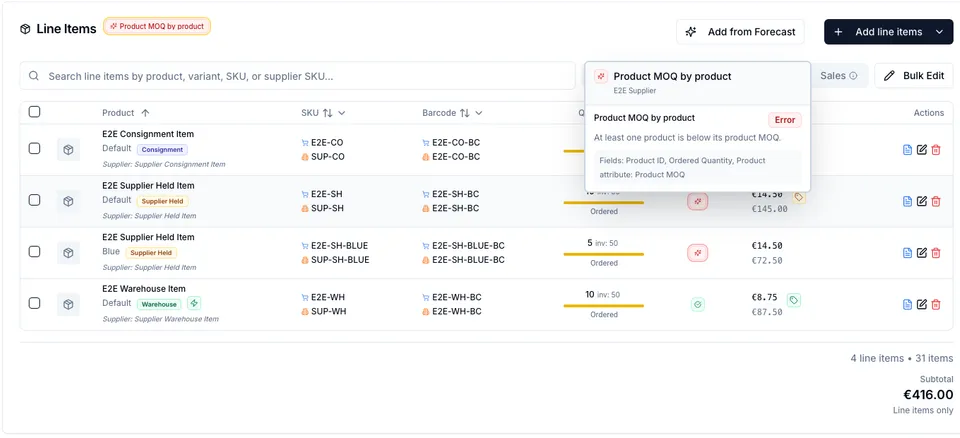
Section titled “5. Preview, save, and verify on a PO”Preview the rule against a real PO. Logistified groups PO lines by product, sums the ordered units across all variants of that product, then compares that sum to the product’s MOQ value. For example, two variants ordered as 10 + 5 units fail when the product MOQ is 20.
Save the settings, then open the PO detail page. The line-item constraint badges and purchase-order hints should reflect the rule. Running the optimizer in Fill gaps can increase existing lines or add eligible supplier variants until the product-level gap is closed.
Example 2: Supplier CBM cap
Section titled “Example 2: Supplier CBM cap”Use this when a supplier or container should not exceed a total volume.
1. Create or map Unit CBM
Section titled “1. Create or map Unit CBM”Open Settings -> Products -> Attribute Definitions and add:
- Attribute name: Unit CBM
- Type: Number
- Level: Variant or Product, depending on how you store volume
- Constraint role: Unit CBM
Enter a CBM value for each relevant product or variant.
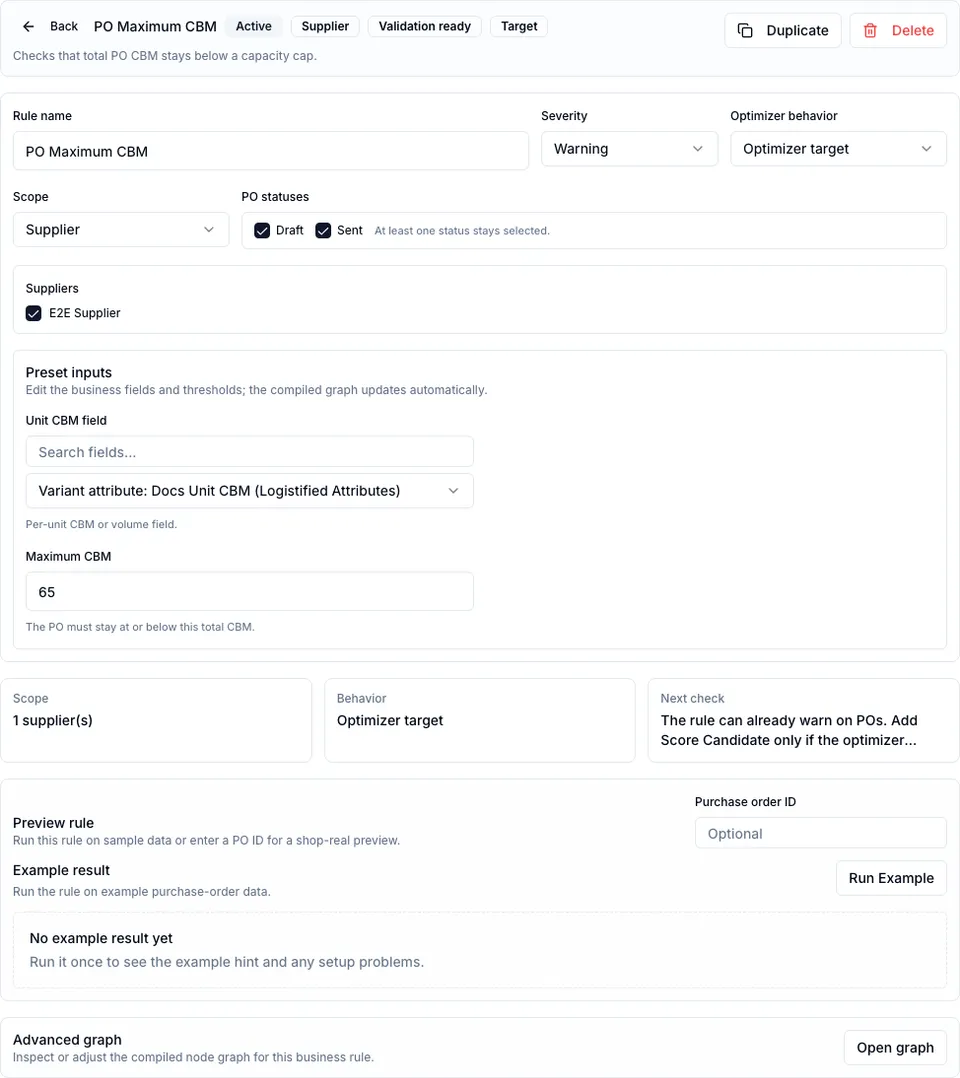
2. Add the PO max CBM rule
Section titled “2. Add the PO max CBM rule”Open Settings -> Purchase Orders -> Constraints, click Add rule, and choose PO max CBM.
Configure:
| Rule field | Recommended value |
|---|---|
| Unit CBM field | Unit CBM |
| Maximum CBM | Your cap, for example 65 |
| Scope | Supplier if only one supplier/container flow needs the cap |
| Optimizer target | On if the cap should constrain optimizer suggestions |
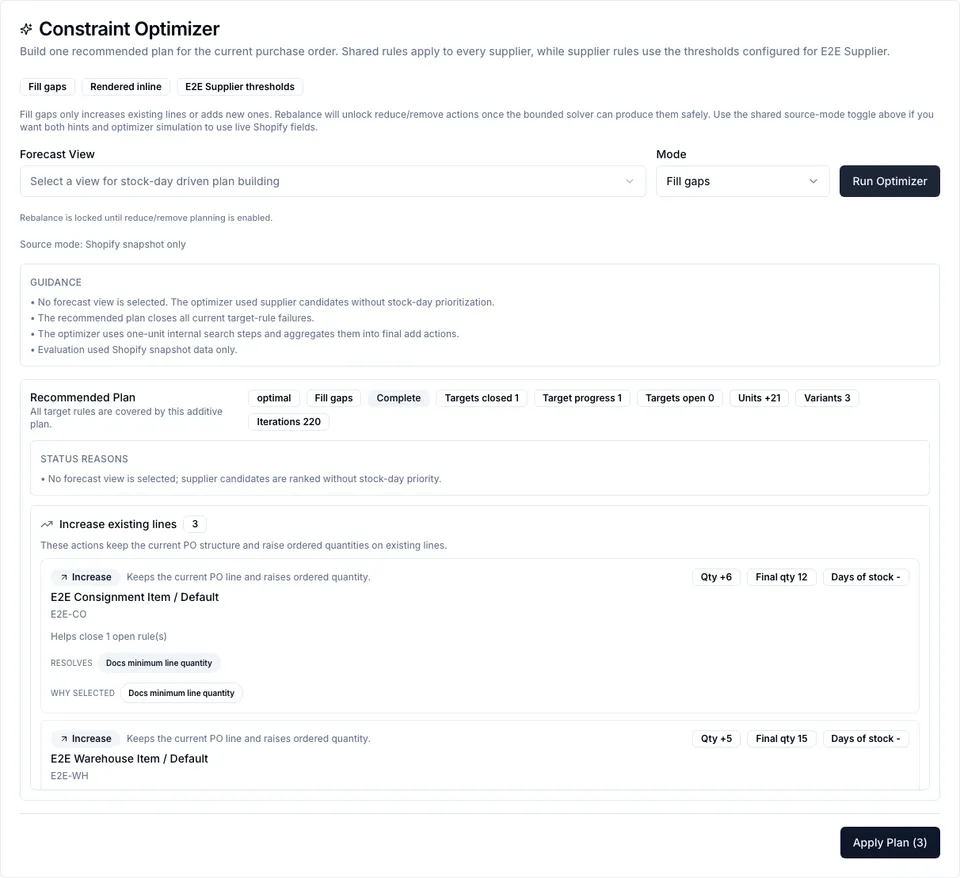
3. Interpret results
Section titled “3. Interpret results”If a PO is over the cap, badges and hints show the violation. In Fill gaps mode the optimizer cannot reduce quantities, so it will avoid additive plans that make hard target caps worse, but it will not remove existing lines. Reduce/remove planning remains locked until Rebalance is available.
Using Data Modeling instead of Product Settings
Section titled “Using Data Modeling instead of Product Settings”Use Data Modeling when the field belongs to a custom table or when you need a linked row, such as a packaging profile or buying family. In Data Modeling:
- Create the table and fields.
- Add rows and values.
- Assign the relevant constraint role to the field.
- Save the data model.
- Return to Constraint Studio and bind the mapped role.
Data Modeling can also create managed Linked table row attributes in Product Settings. Those managed attributes are visible there, but they are edited from Data Modeling.
Run and apply an optimizer plan
Section titled “Run and apply an optimizer plan”Open a Draft or Sent PO and click Optimize. Choose Fill gaps, review the status, reasons, and actions, then click Apply Plan and confirm.
After apply, Logistified refreshes the PO and reevaluates constraints. Sync to Shopify remains a separate lifecycle/sync action.
Troubleshooting
Section titled “Troubleshooting”| Symptom | Likely cause | Fix |
|---|---|---|
| Product MOQ is not suggested in the rule | The attribute is not Product level, not Number type, or has no Product MOQ role. | Edit the attribute definition and save it. |
| Readiness role is still missing | A Data Model mapping or attribute role was not saved, or another field already owns the role. | Save/reload the settings page and check duplicate roles. |
| Preview says required data is missing | Some PO lines do not have the required attribute value. | Fill values on the product/variant or use a rule that tolerates missing data. |
| Optimizer returns no actions | The PO already satisfies targeted rules, candidates are missing, or Fill gaps cannot solve the violation. | Check status reasons and remaining rule reasons. |
| Apply fails as stale | The PO changed after the plan was created. | Reload the PO, run the optimizer again, and apply the fresh plan. |
See also
Section titled “See also”- Product & variant attributes
- Settings -> Data Modeling
- Purchase Orders -> Constraint Studio
- Use the constraint optimizer